In areas like Arlington, Marysville, Lake Stevens, and Stanwood, roofs have to face a unique combination of challenges, such as the constant rains in the Pacific Northwest, winter snow, and moss growth in damp or shaded neighborhoods. These circumstances have the potential to speed up wear, resulting in damaged shingles, leaks, and other home roof problems. When you begin to notice new roof signs such as granule loss, sagging areas, or curling shingles, it’s time to take some action. In addition to protecting your home, a new roof in Arlington, Marysville, WA, and surrounding areas also restores its safety and value.
In this guide, we will take you through every step of the installation of a new roof in Lake Stevens, Camano Island, or Stanwood, from preparing your property to final inspection and continuous maintenance. You will know exactly what to expect on the installation day.
Pre-Installation: Getting Ready
If you want the installation to go smoothly and successfully, preparation is crucial before the first tool is taken out or the first shingle is removed. In Pacific Northwest areas, seasonal rain can cause delays in projects, so if schedules are not planned carefully, moss and algae growth often require extra surface preparation before starting. Understanding these local factors ensures your new roof project in Arlington, Marysville, or nearby areas starts on the right foot. Before the installation process starts, you should have the following things ready:
1. Choosing a Contractor and Materials
The first step is to select the right roof contractor in Lake Stevens, Camano Island, and the surrounding areas. They look for roof replacement indicators, like missing shingles, moss, or slippage, and avoid home roof problems from becoming emergencies. At S&S Roofing, our team starts with a thorough inspection to determine the age and extent of damage to the roof, and accordingly, will suggest long-lasting materials, steel panels, or asphalt shingles. This customized approach will save you time, worry, and money.
2. Scheduling and Permits
Prepare the necessary paperwork and schedule before starting the installation of your new roof in Arlington, Camano Island, Lake Stevens, and other nearby areas. This helps us to complete the project on time without any delays. Some important steps are:
- Checking local building codes and HOA requirements.
- Applying for and obtaining necessary permits.
- Arranging the installation for a time when the weather is ideal.
3. Protecting Your Property
While installing the roof, your home gets exposed to damage from debris and moments. Contractors take precautions to ensure everything is safe and intact. This often consists of:
- Laying down protective tarps over landscaping and decks.
- Moving fragile outdoor items away from the work zone.
- Covering attic storage to shield it from dust.
4. Interior Preparations
We also help you prepare indoors by covering valuables and clearing out attic spaces. Expect a walkthrough with our team to go over interior rules and noise expectations until your new roof project is complete.
When you take the time to complete these steps prior to the installation day, a quicker, cleaner, and more effective procedure will be followed. You will not have to worry about needless delays once permits have been obtained, and you have safeguarded your property with all the materials used, you will be able to ensure that your investment in a new roof will be provided with lasting protection.
Day of Installation: The Process Unfolds
An exciting first step towards increasing home security is installing a new roof in Arlington, Camano Island, Lake Stevens, and other nearby communities. On the day of installation, your new roof will be installed perfectly with precision and teamwork. This is how the procedure plays out:
1. Arrival and Setup
Our team arrives on time and sets up work zones and safety cones for the new roof in Lake Stevens and Stanwood, WA. We set up roof jacks and drop cloths, have a quick safety briefing, make sure all your needs are acknowledged, and start with an orderly, professional setup.
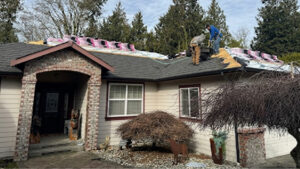
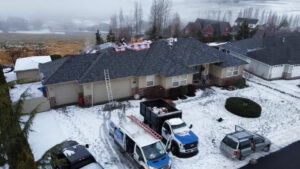
2. Old Roof Tear-Off (Demolition)
This step exposes any hidden problems and makes room for your new roof. It ensures the new material will have a strong base. The process entails:
- Stripping away old shingles or tiles.
- Disposing of debris in designated dumpsters.
- Inspecting the roof deck for damage.
3. Decking Repair/Replacement (If Needed)
After removing the old roofing, we look for signs of any wood rot or warping. If any such problem is found, we replace or repair the decking. Strength, durability, and protection against future problems such as leaks or sagging are all ensured by protecting the base.
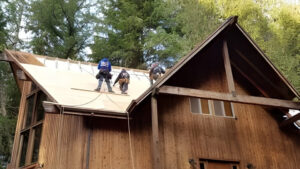
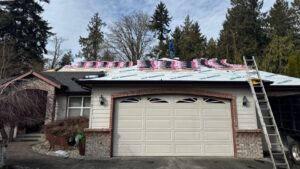
4. Underlayment Installation
Flashing and underlayment protect against leaks and water damage. Installing them correctly is pretty important for a long-lasting roof. This includes:
- Rolling out waterproof underlayment.
- Adding flashing around chimneys, vents, and valleys.
- Sealing potential leak points.
5. Flashing and Drip Edge
We replace the flashing around roof edges, chimneys, and vents, all the areas that are vulnerable to leaks. A strong drip edge keeps shingles and fascia boards from rotting by facilitating proper water drainage of the roof.
6. New Roofing Material Installation
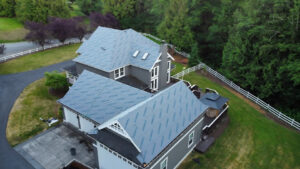
You can begin the transformation of your home now, whether you’re going for a classic look in Stanwood or long-lasting durability in Marysville. Our team guaranteed straight lines and tight seals while carefully aligning, fastening, and sealing metal panels or shingles during the new roof installation of your home.
7. Final Touches
The last stage ensures the roof satisfies quality standards and the site is clean. It’s the last inspection before finishing. This includes:
- Removing all leftover debris and nails.
- Perform a full visual inspection of the roof.
- Reviewing the work with the homeowner.
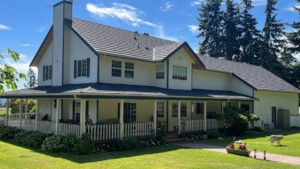
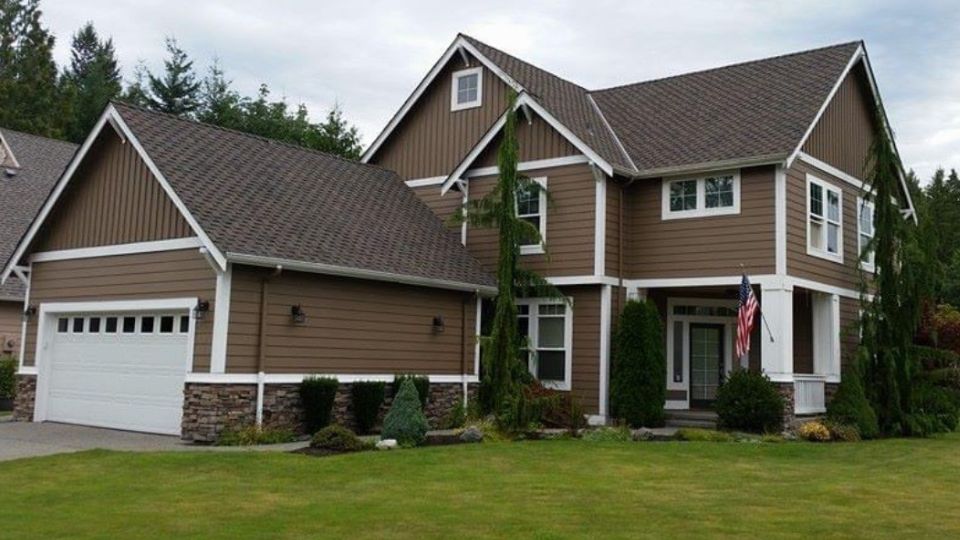
By the end of the day, your home will have a new roof that is built to last and ready to withstand the area’s harsh weather. In addition to strengthening your house, a professionally installed new roof increases its curb appeal and value.
Post-Installation: Completion and Cleanup
The process does not end after the installation of your new roof in Arlington, Camano Island, Lake Stevens, and beyond. The post-installation steps are equally important; they ensure that your property is left pristine and your roof is ready to use after everything is done. Here is what you can anticipate once the final shingle is set:
1. Thorough Site Cleanup
As a part of our cleanup, we will sweep the magnet in your driveway, sidewalk, and yard, leaving no granules or stray nails behind. We cleared away tarps, gathered trash, and restored the original appearance of your property.
2. Final Inspection
The S&S Roofing team conducts a walkthrough with you, and we check every single line and flashing. Before leaving, we make sure that all symptoms, such as leaks, granules, field cutters, or issues, home roof problems, are fixed and the proper water drainage is checked.
3. Payment and Warranty Information
We provide the final invoice, warranty information, and payment options. Our manufacturer’s warranties and workmanship ensure years of peace of mind. There won’t be any scope for surprises as we explain coverage terms in simple language.
4. Ongoing Maintenance Tips
We advise doing a seasonal check to keep your roof in top shape when you move out. Look for moss or algae, keep an eye out for missing or curling shingles, and remove any debris. A properly maintained new roof can last for decades
By the end of the cleanup process, your home will be free of debris with a new roof installed, looking flawless. This last step gives you confidence and durability of your roof by ensuring not only a stunning finish but also a secure respiratory environment.
Your Roof Installation Journey: From Preparation to Lasting Protection
Getting a new roof in Arlington, Camano Island, Lake Stevens, Marysville, or Stanwood isn’t just about replacing our old shingles; it’s about safeguarding your home from all the elements the Pacific Northwest throws at it. Between the heavy rains, winter snow, and those surprise windstorms, a strong and well-installed roof is a must. By knowing what happens before, during, and after installation, you’ll feel more confident and less stressed about the whole process.
Here at S&S Roofing, we love helping homeowners in our Snohomish County service areas get a new roof they can count on. We take care of everything, from comprehensive inspections and repairs to complete replacements and routine maintenance, using materials built for our unique weather, like asphalt shingles and steel panels. Our goal? A roof that looks great, lasts for many years, and gives you peace of mind every time the clouds roll in.
If you’re ready to get started, give S&S Roofing a call at 360-386-9903. We’ll be happy to answer your questions, walk you through your options, and help you kick off your new roof project the right way.